
Corvette C3 Clock Repair
 |
 |
 |
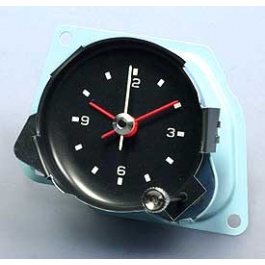 |
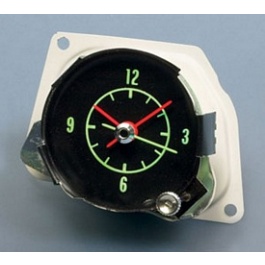
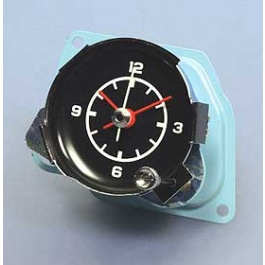
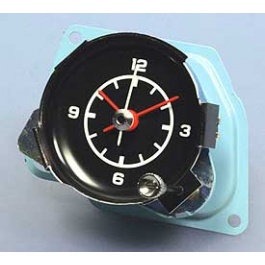
| 1968 - 1971 | 1972 - 1974 | 1975 -1976 | 1977 |
 |
 |
 |
|
| 1978 - 1979 | 1980 - 1981 | 1982 |
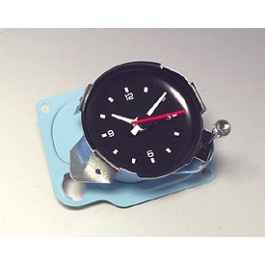
Chances are pretty good that the clock in your C3 is not running. Chances are also pretty good that there is not too much wrong with it either. C3 clocks are mechanical with an electric winding mechanism. If you listen closely to a working C3 clock, you will hear a click about every couple minutes. What you hear is the mechanism winding the main clock spring. This winding mechanism has a set of contact points that corrode over time and eventually the mechanism stops working and your clock stops. Of course like any other mechanical clock, they also get dirty and lose their lubrication over time.
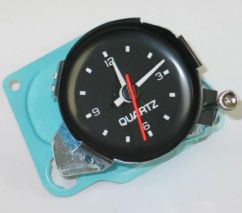
If you are not concerned about originality, you can convert your mechanical mechanism to quartz. However, there is a bit of nostalgia associated with the tick of the original mechanical units.
In order to service your clock you will need to remove the hands and clock face from the case. The hands pull off the shaft, preferably with a hand puller. The clock face is held on by three tabs bent at 90 degrees to the case. These tabs are aluminum and were never designed to be straightened and then bent back again. However, if you are careful you can bend then back once without too much trouble. Once you have the face off there are four places where the top of the case is held to the main case. Using a pair of pliers bend back the two end tabs and the two indentations along the sides so that the mechanism can be pulled free of the case. Using a small points file or fine abrasive paper clean the contact points. Clean the mechanism with low pressure air. Spray the unit with WD40 and then blow dry with low air pressure. Lubricate the moving parts with clock lubricant. Bench test the mechanism with a 12 volt source by connecting the positive lead to the terminal on the back of the clock and the negative lead to the ground strap under that surrounds the rubber grommet. You should hear the clock wind and start up. If that is the case you can put things back together in the reverse order that you took it apart. If the clock does not start up then most likely there are other issues with it. If the winding coil looks black then it possibly may be burned out.
Please understand that these clocks have a self adjusting mechanism. When you turn the hands counter-clockwise (back), you are slowing down the clock and when you turn the hands clockwise (forward), you are speeding up the clock. After a week of adjustment, your clock should be keeping accurate time.
1977 - 1982 Clock Removal
It is a fair amount of work to get the clock out. The center instrument cluster has to come out to get at it.Disconnect your battery cables.
The cluster bezel is secured with two screws at the top, one on each
side and two on the bottom, which are only accessible by taking the sides off
the console. The sides are secured with three Phillips screws. The center ones
are a little hard to get at as the seats are in the way. If you push down on the
seat cushion far enough you can get those center ones out.
Once you have the sides off, there are two 1/4" hex head screws going up
into the bottom of the instrument bezel. They are the only screws securing the
top of the console to the cluster bezel. You also need to drop the radio and
push it back out of the way.
The radio has nuts under the two knobs and a hex head screw securing it
on the passenger side.
Once you take out the other four Phillips screws, the cluster is ready to pull
forward.
You might want to put something on top of the console to protect it.
Carefully pull the cluster back and at the same time clear the radio
from the holes in the bezel.
Also be careful to watch the top where the light socket for the heat
controls goes in, as it will catch the top of the dash.
There is a connector that you will need to pull apart for this light.
Once you get the cluster pulled ahead far enough, reach behind and pull
the wiring harness out of the cluster.
The harness has clips on each end that when squeezed frees the plug from
the socket.
Now you can pull the assembly out and you will see that the clock is
held in with a couple 1/4" hex screws.
The set knob for the clock is held on with a slotted hollow screw that
you need to take out as well.
Remove the nut that attaches the circuit board to the back of the
clock.
You may want to remove some of the light sockets to give you room to
lift the circuit board up to clear the clock when you pull it from the cluster.
You may want to replace the instrument bulbs while you have the assembly
out.
Putting the clock back in is just the reverse procedure.
![]()
![]()