Finally, there are direct bolt on replacement calipers for the C2 and C3 Corvettes. C3 owners know that the brake calipers on these cars can be very high maintenance items. How many times have you had to bleed your calipers only to discover that you had to bleed them again a few days later? How many times have you replaced the seals in your calipers? Caliper 'O' ring seal kits have been available for years but have they resolved your braking problems?
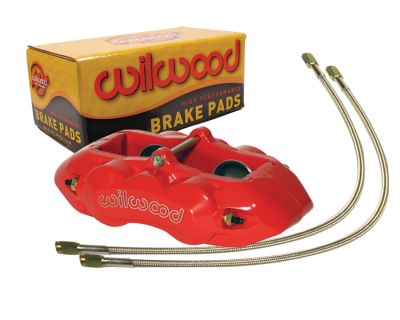
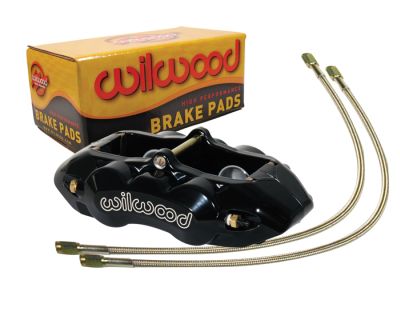
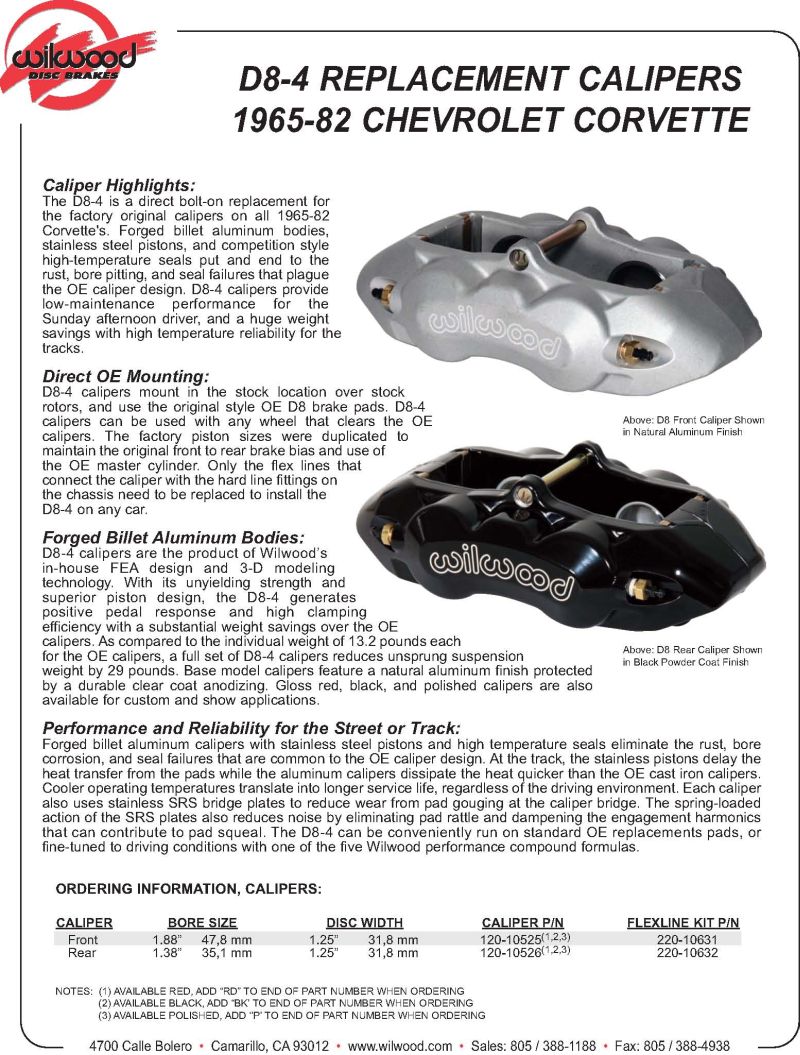
It is time to solve all these caliper problems once and for all. Wilwood Disc Brakes have just introduced a direct bolt on replacement for the factory original calipers. Yes, they bolt to the original brackets and use OEM brake pads. The only thing you need to change are the flex lines and it is probably time that you replaced those anyway.
Caliper Features:
� All Forged aluminum
bodies
� Great increased rigidity improves braking
� Significantly reduced weight at only 5.8 lbs (compared to cast iron
replacement at 13.2 lbs)
� 56% reduction in unsprung caliper weight
� Sealed stainless steel pistons
� Black, Red, Clear, and Polished Finishes
|
|
|
|
Front Kit |
Rear Kit |
This what you should have in front of you when you are ready to do your install.
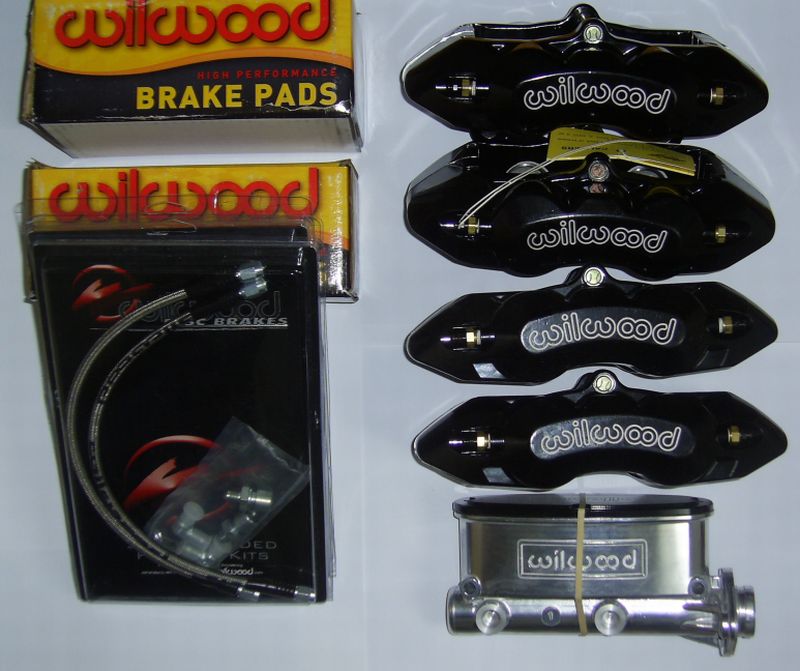
Wilwood Direct Fit Caliper Installation Kit
The install is about as easy and straight forward as it gets. Although it not necessary, I recommend that you swap out your old and heavy OEM master cylinder as part of the install. The master cylinder that you will need is Wilwood part number 260-8556P. This is a 1.12" bore (power brakes) or if you have manual brakes, you should go with a 1" bore Wilwood part number 260-8555P. The 'P' denotes a 'bright' aluminum cylinder. The Wilwood master cylinder weighs less than half of your OEM master and your brake line configuration will require no modifications whatsoever.
After securing your car on jack stands and with wheels removed, you are ready to dismantle your OEM brake system. To avoid as much mess as possible, I recommend that you begin at the master cylinder. Even if you do not plan to replace your master, you need to drain the break fluid and blow out the lines. You do not want to contaminate your new calipers with old fluid. Remove the cover from your old master and remove the fluid from both chambers with a suction device. Brake fluid is nasty stuff around paint so you want to be careful. Disconnect both brake lines. Even if you are not replacing the master, you will want to remove it for cleaning and bench bleeding. Remove the two nuts retaining the master to the vacuum booster and pull the master out.
You are now ready to remove your four OEM calipers.
The first thing you will want to do is remove the old lines. On the
front, you will be replacing the old flex lines with new ones.
Disconnect the front lines at the frame bracket by loosening the 3/8" line nut
from the old flex hose. A little WD 40 may help you here especially if
your lines are corroded at all. Once you get the steel line pulled out
of the old flex line, pull the lock off holding the flex line to the frame
bracket. The front calipers are retained by two bolts passing through a
steel bracket into the calipers. One you remove these bolts, pull the
caliper upwards and off. It is not necessary to remove the pads or hose
from the caliper, you can do that later. Right now you have your first
boat anchor ![]() .
.
Repeat the procedure for both fronts and now go to the rear. The procedure is very similar. You will notice that there is a steel brake line going from the caliper along the top of the trailing arm making a connection to a flex line. This short steel line needs to be removed and eventually you will be replacing it with a flex line that is in your kit. The rear calipers are connected to the rear spindles with two bolts that pass through the caliper into the spindle. Remove those bolts and pull the caliper upwards and off the same as you did for the front ones.
How much cleanup and detailing you want to do at this point is up to you. Make sure your rotors and caliper mounting points are clean and smooth. Before you begin the reassembly, you will need to blow your brake lines out using compressed air. Make sure you have a container over all four lines to collect the fluid. Blow them out from the front using the two lines that connect to the master cylinder.
Take a break at this point and open up the flex line kits, your new calipers and pads. You will notice that the fluid supply to the Wilwood calipers is at the back of them. There are four right angle fittings in your flex hose kits, one for each caliper. Take a bit of Teflon tape and put a wrap or two around the tapered end of the right angle fittings. Be careful not to get any tape inside the fittings. Pull the tabs off the back of each caliper and screw the right angle fittings in. Do not completely tighten these fittings as you will need to clock them at the correct angle for the flex lines once the calipers are installed. In the front hose kit you will find a couple of connectors that need to be mounted in the frame brackets using the clips that you originally removed. You can install those now.
Starting with the front, slip one of your new calipers over the rotor and bolt it in. I highly recommend that you use anti-seize compound on these bolts. These are steel bolts going into aluminum. If not anti-seize compound, at least use some lubricant on the bolts. Before you proceed with the install, there is one thing that you need to do and that is to check the caliper for wheel clearance. This is particularly necessary, especially if you have the aluminum wheel option or after market wheels. A minimum of 0.050" clearance is recommended. If you detect any rubbing at all, this needs to be rectified. The most likely culprit is a distorted mounting bracket. These brackets are pressed steel with a factory bend and over time, they can distort and misalign the caliper.
You can now connect the flex line to the caliper and brake line. Make the two connections at the frame bracket followed by the connection on the back of the caliper. Clock the right angle fitting on the caliper so that the flex line is under the top ball joint mount and does not come in contact with any moving components.
Using needle pliers, remove the retaining clip holding the brake pad pin in place. Drop a new pad in the outer side and start the pin back in. Drop the inner pad in place and shove the retaining pin through. With your needle nose pliers, insert the retaining clip back in. A nice feature of these calipers is the stainless clips inside that rest against the ends of the pads. These clips are an anti-rattle feature, something we did not have with the OEM calipers.
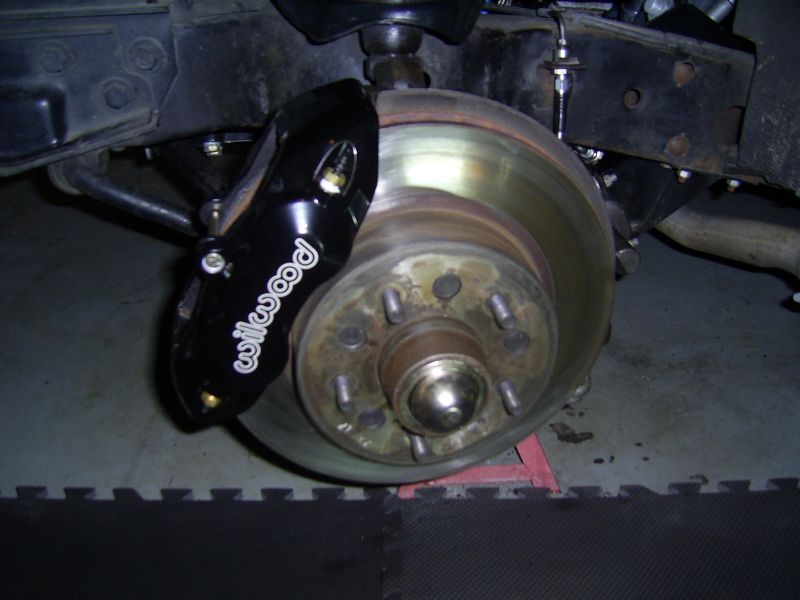
Front Install Completed
The rear install is accomplished in a similar manner. One thing you need to be aware of is that the mounting lugs on your new Wilwood calipers are 1/4" thicker than the OEM ones you removed. This means that you must use bolts that are 1 3/8" long rather than the original 1 1/8". The longer bolts may or may not be included with your rear calipers. Do NOT use bolts longer than 1 3/8". Once you bolt the caliper in, connect the new flex line. Like you did on the front, clock the fitting on the back of the caliper so that the flex line will lay on top of the trailing arm away from any moving components. Check for caliper wheel clearance. Install the pads the same way as you did for the front calipers.
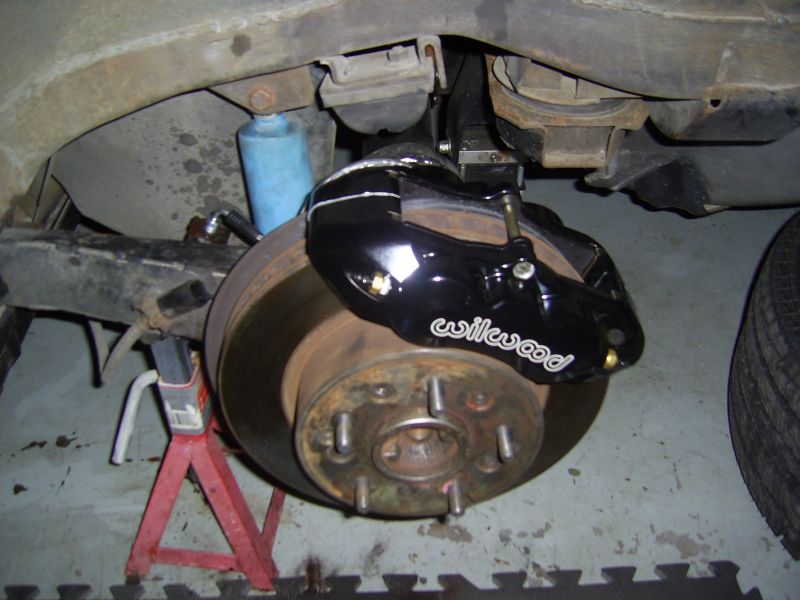
Rear Install Completed
Time for another break while you walk around and admire the
look of your new calipers
![]() . The next step
involves bench bleeding your new Wilwood master cylinder or your OEM that you
plan to put back on. Regardless of which one you use, the bleeding
procedure is the same. I can tell you that bench bleeding the Wilwood is
much faster than the OEM. Your Wilwood master comes with a couple of
sizes of fittings and a couple of block off plugs. These plugs will be
installed on the right side of the master. Put a bit of silicone grease
on the plug threads, add one of the aluminum compression washers to each plug
and tighten them. On the other side, select the correct fittings and
follow the same procedure for installing them as you did for the block off
plugs. The larger thread fitting goes at the rear. You will need
to make up a couple of bleeder hoses if you do not already have a set.
The hoses will be connected to the two outlet fittings of the master and the
hoses will wrap up around and into the respective reservoirs for the bleeding
process.
. The next step
involves bench bleeding your new Wilwood master cylinder or your OEM that you
plan to put back on. Regardless of which one you use, the bleeding
procedure is the same. I can tell you that bench bleeding the Wilwood is
much faster than the OEM. Your Wilwood master comes with a couple of
sizes of fittings and a couple of block off plugs. These plugs will be
installed on the right side of the master. Put a bit of silicone grease
on the plug threads, add one of the aluminum compression washers to each plug
and tighten them. On the other side, select the correct fittings and
follow the same procedure for installing them as you did for the block off
plugs. The larger thread fitting goes at the rear. You will need
to make up a couple of bleeder hoses if you do not already have a set.
The hoses will be connected to the two outlet fittings of the master and the
hoses will wrap up around and into the respective reservoirs for the bleeding
process.
Clamp the master cylinder in a bench vice (make sure to choose a mounting point which will not damage the cylinder). You can fill the master cylinder reservoirs with new brake fluid. The choice of fluid type should be DOT 4 or DOT 5.1. DOT 5 is not recommended for reasons explained here. I used a high quality DOT 4 as it is readily available. Make sure the bleed hoses are submersed in the fluid. Using an appropriate tool, slowly push the master cylinder plunger in and out. You will see lots of air escaping from the hoses and chambers. Continue this process until you see absolutely no air coming from the hoses or chambers. With the Wilwood cylinder it will only take a couple of minutes or less. The bench bleeding process will take longer with the OEM cylinder.
The next step is to mount the master back in the car and hook up the two brake lines. Make sure the master is filled with fluid and put the cover back on. Leave the two bleeder hoses connected until you have the cylinder bolted back on to the brake booster. With the next step, the quicker you are, the better. One at a time, remove the bleeder hose from the master and connect the lines. A bit of fluid will escape during this process but it should be minimal. Make sure you have something absorbent under your work area to collect the fluid. Below is a picture of my install. I happen to be using a hydroboost system rather than the vacuum booster brake system that you are most likely using. The procedure is the same for both.
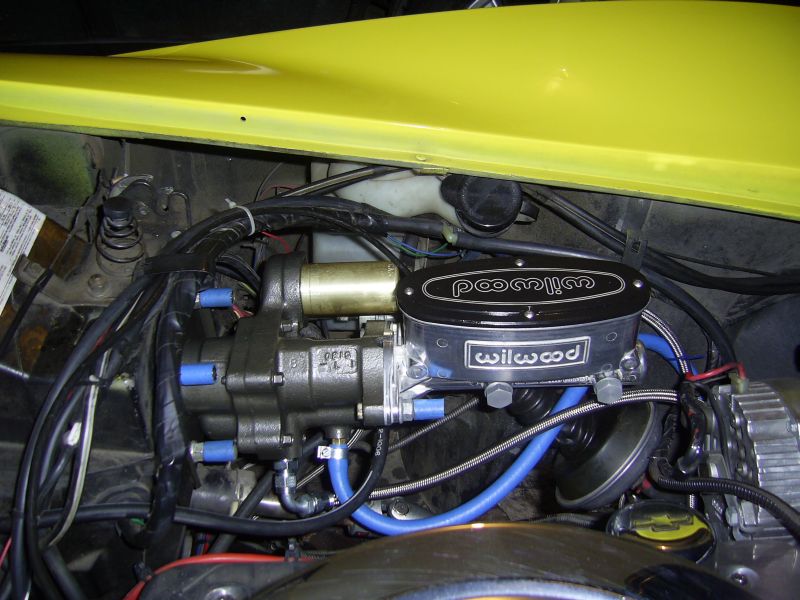
Wilwood Master Cylinder Installed
The one remaining task is bleeding the system from the master to the calipers. With the Wilwood calipers, bleeding is a very easy task compared to bleeding the OEM calipers. Have you noticed that the Wilwood calipers each have four bleeding screws? They have a bleeding screw for each piston. Not only do they have four bleeding screws, but these screws are mounted in brass seats. This means they will never seize like the ones do in the OEM calipers.
It is standard practice to bleed calipers by doing the one longest away from the master first. Bleed them in this order: right rear, left rear, right front and finally left front. Take the top off the master and make sure it is full of fluid. A gravity bleed should work fine on this setup. Loosen the two bottom bleed screws on the caliper. Wait until fluid starts to trickle out. Let it trickle for a few seconds and then close the screws. Repeat the same for the top pair of bleeder screws.
Check the master and top it up with fluid. Repeat the same steps for the other three calipers. The entire procedure took me about 15 minutes. It takes longer to do the first one because the fluid has to fill the longer lines first.
You are now ready to test a few things. Ensure the master is topped up with fluid and replace the cover. Double check to make sure all 16 bleeder screws are tight and that there are no visible leaks at any of your connections. The next step is to see what the brake pedal feels like. Apply the pedal a few times (don't start the car up yet). Once again check all your connections for leaks. Make sure the car in in park (automatic) or neutral (manual). Start the engine and pump the brake a few times.
With my install, I had a full firm pedal after a few pumps. I did not have to doing any further bleeding. If you detect some sponginess or softness in the pedal, that is probably an indicator of some air in the lines somewhere. You can try some more gravity bleeding to resolve it or you may need to vacuum or pressure bleed. That was not necessary with my install at all.
Wheels go back on and out for a road test. Try some braking at lower speed first to get a feel for the pedal effort and then progress up to your normal cruising speed. One word expressed my feelings about the install and that word was 'WOW'. The expression 'stopping on a dime and having a nickel in change' applies here. With my old OEM system, locking all four was out of the question. With this setup I can lock all four at 60 mph if the need were to arise.
Although I have not driven the car enough yet to give a complete evaluation, I am certainly impressed with the easy bleeding process, the quality of the hardware and the responsiveness. Wilwood have an excellent support team at your fingertips should you require their assistance.
I think this is one of the best enhancements you can add to your car. Considering the many headaches of the original OEM braking system and the continuous bleeding problems, I think resolving those problems alone is well worth the investment.
Oh, and did I tell you our car is almost 50 pounds lighter?
I better whisper that, don't need my wife to hear that
![]() .
.
![]()
![]()